


- Resolution
- Using the same MCU and core circuit as AT AVRISP, easy to use, stable and reliable
- Based on ATMEL official STK500 firmware, identified as AVRISP/STK500 in AVRStudio, high speed programming
- Standard ISP_6PIN connector
- CH340G USB to UART converter, supports most popular OS, including WIN10, more stable, faster programming
- Supports AVR Studio 4/5/6/7
- Supports 0~3.6864MHz frequency output (via the two through holes on the backside, round=GND, square=PCLK, frequency is configurable by software)
Summary
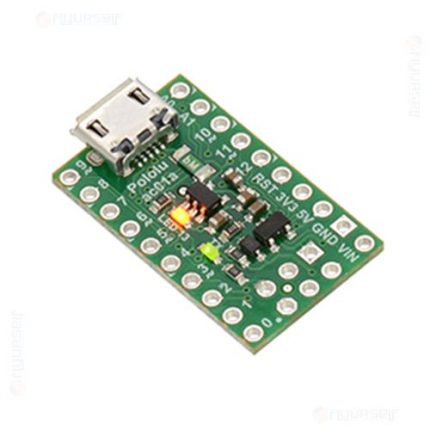
- Assembled and ready to use
- 6-pin AVR-standard interfaces
- 2 LEDs to indicate “USB/Power good” and “Busy”
- USB powered
- USB cable (A to B type) is included
Instructions:
- Use AVRDudess GUI to use this programmer to upload your HEX file. You can download it from here!
- Connect programmer and ICSP of Arduino with the 6-pin cable adaptor included. Then connect AVRISP to computer by USB cable (A to B type).
- After the hardwares are connected, we can start the Arduino IDE. Under the list of “Tools”->“Board” , choose your Arduino version. Then click “Tools” -> “Burn Bootloader” -> “w/ USBtinyISP” to start burning Arduino bootloader
- During burning, you will see the “BUSY” Led flashing
- It will take awhile to burn (but still faster than USBasp ). You will see “Done burning bootloader” at Arduino IDE when it is done.
Supported Software
- AVR Studio or WINAVR(GCC) is used as front-end software
- Supports files generated by IAR, ICCAVR, CVAVR, etc.


Reviews
There are no reviews yet.